
Step-by-Step Guide: How To Receive Payments as a Freelancer Or Creator On Selfany
Step-by-Step Guide: How To Receive Payments as a Freelancer Or Creator On Selfany
As a freelancer or creator, getting paid should be simple—but too often, it’s anything but. Late payments, high fees, and currency barriers can make receiving payments a stressful and frustrating part of your job. Limited payment options, long transfer times, and expensive currency conversions only add to the headache.
But what if there was a way to make it easier?
That’s where Selfany comes in. With its user-friendly platform, Selfany streamlines the payment process, ensuring you get paid faster, with fewer fees, and without the hassle of dealing with multiple currencies. In this step-by-step guide, we’ll show you exactly how to receive payments seamlessly through Selfany. Let’s get started!
1. Create a Free Selfany Account
Starting with Selfany is quick and easy. Here's how you can set up your account and start receiving payments without all the usual headaches:
1.1 Sign Up
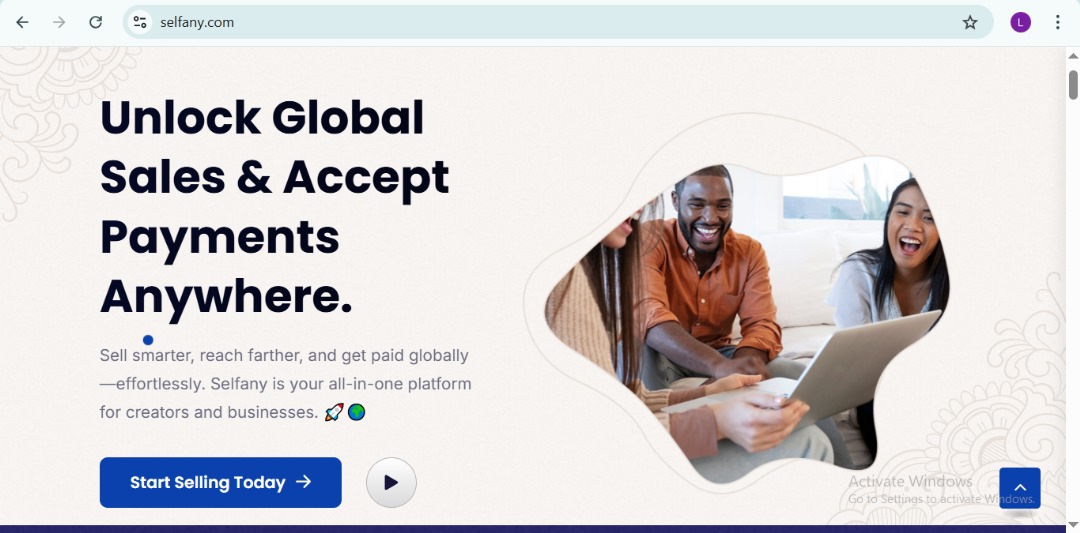
Head to the Selfany homepage, click on the "Start Selling Today" button, and enter your email address. It takes just a few seconds to get started.
1.2 Verify Your Email
After signing up, check your inbox for a confirmation email from Selfany. Click the link inside to verify your email and activate your account.
That’s it! Your Selfany account will be ready to go. Now, you're all set to start receiving payments quickly and securely. It’s simple, safe, and hassle-free!
2. Access Your Creator Dashboard
Now that your Selfany account is ready, it’s time to become a creator! Setting up your creator profile will help you manage your work and start receiving payments without a hitch. Here’s what you need to do:
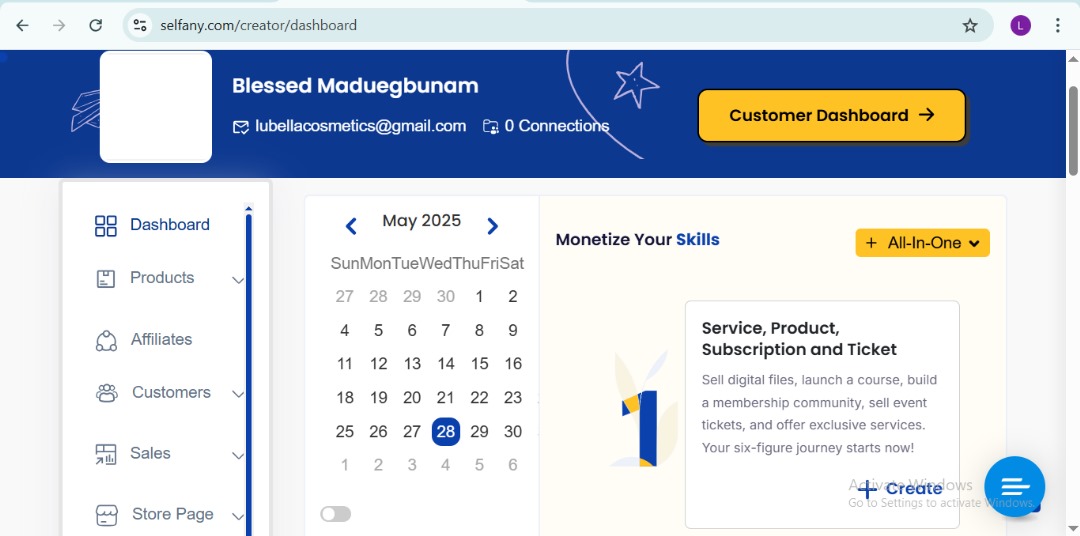
Switch to Creator Dashboard
To access creator features, click the “Become a Creator” button (top right corner).
This will open up your Creator Dashboard, where you’ll manage everything from product uploads to customer orders.
Once you’ve set up your profile, you’re good to go! This will make it easier for your clients to find you, trust you, and pay you without any problems.
3. Add Your First Product
Here’s where the fun begins: putting your service out there for the world to see.
3.1 Head to the “Products” Tab
Click “Products” “Add Product” from your dashboard.
3.2 Choose Your Product Type
You can list a:
-
Digital File (like an eBook or template)
-
Course
-
Service
-
Subscription
-
Physical Product (if you’re selling merch or accessories)
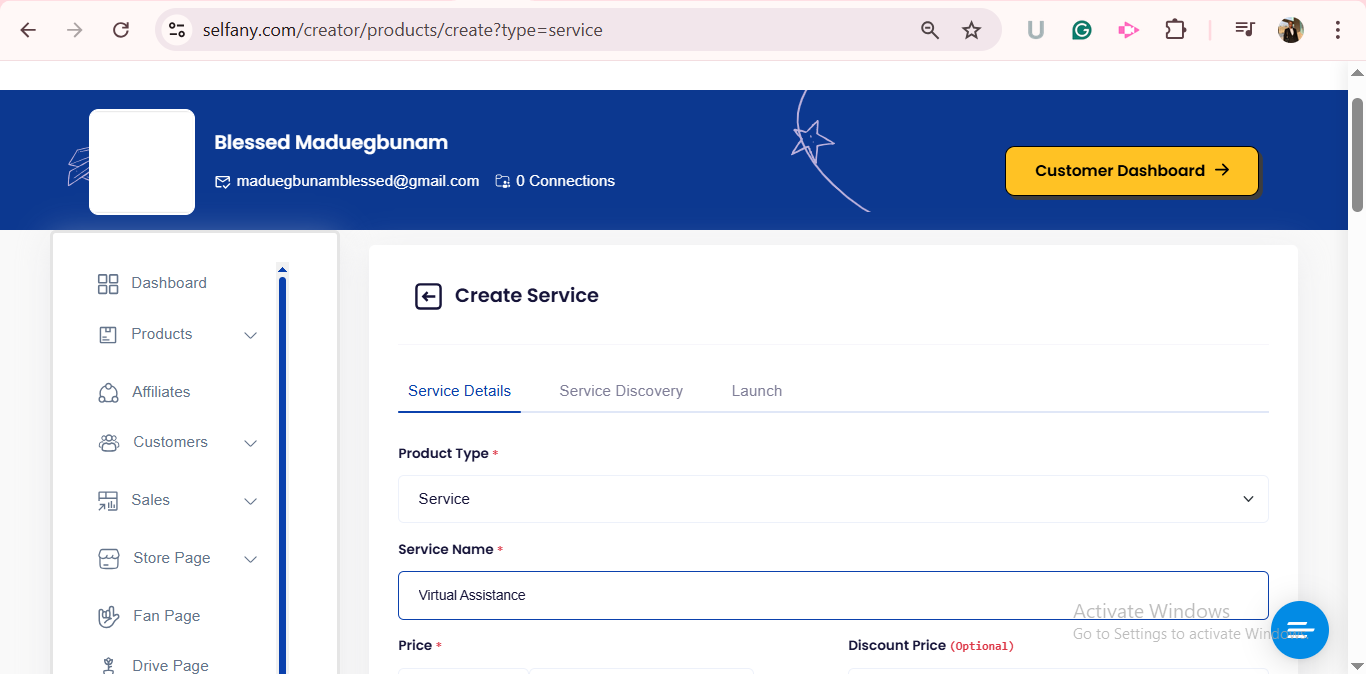
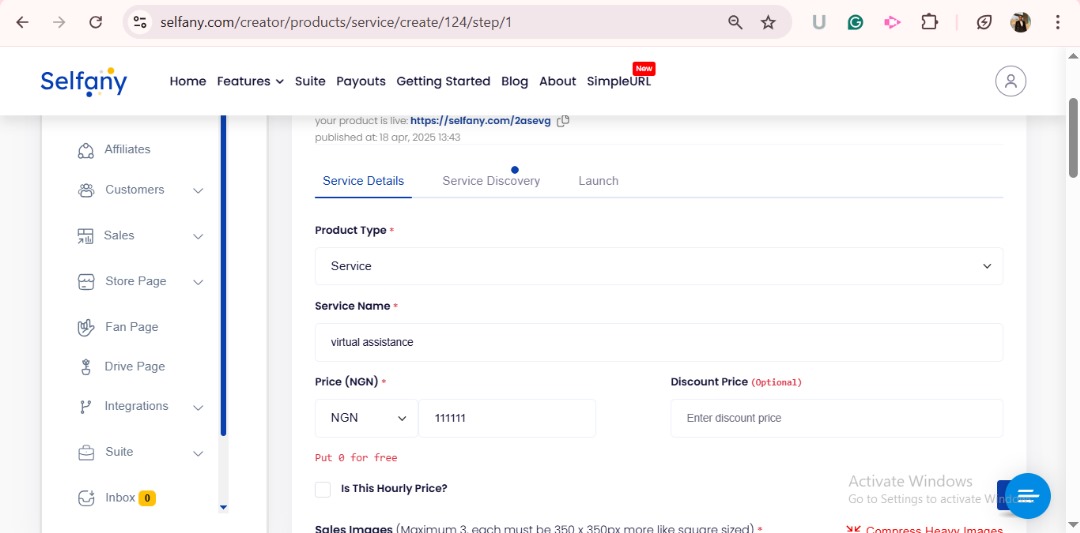
4. Fill In The Service Details Page
Now it’s time to create your custom payment link and start offering your services or products! Here’s how you can create a link that makes it easy for clients to pay you:
4.1 Add a Service or Product
From your dashboard, navigate to the “Product Type” section. Choose the type of offer you’re providing, either a service (such as virtual assistance, coaching, or consulting) or a digital product (such as an eBook, template, or digital download).
4.2 Set Pricing, Description, and Uploads
-
Set Your Price: Put in a clear, fixed price for your service. You can also set a discount price if needed, or enter zero to offer the service for free. Check out this guide on how to set a price for your service or product.
-
Describe Your Service: Provide a detailed and compelling description of what clients will receive, what the service includes, how it works, and what makes it valuable.
-
Specify Location and Audience: Indicate where the service will take place and who it is suitable for. These help manage clients expectations and target the right audience.
-
Upload Images: Add a relevant image to enhance the listing and give your service a polished look.
4.3 Set Availability
Enable the availability setting and select the days you’re available to work. This helps clients know when they can expect your service and allows you to manage your schedule effectively.
4.4 Categorize and Optimize for Discovery
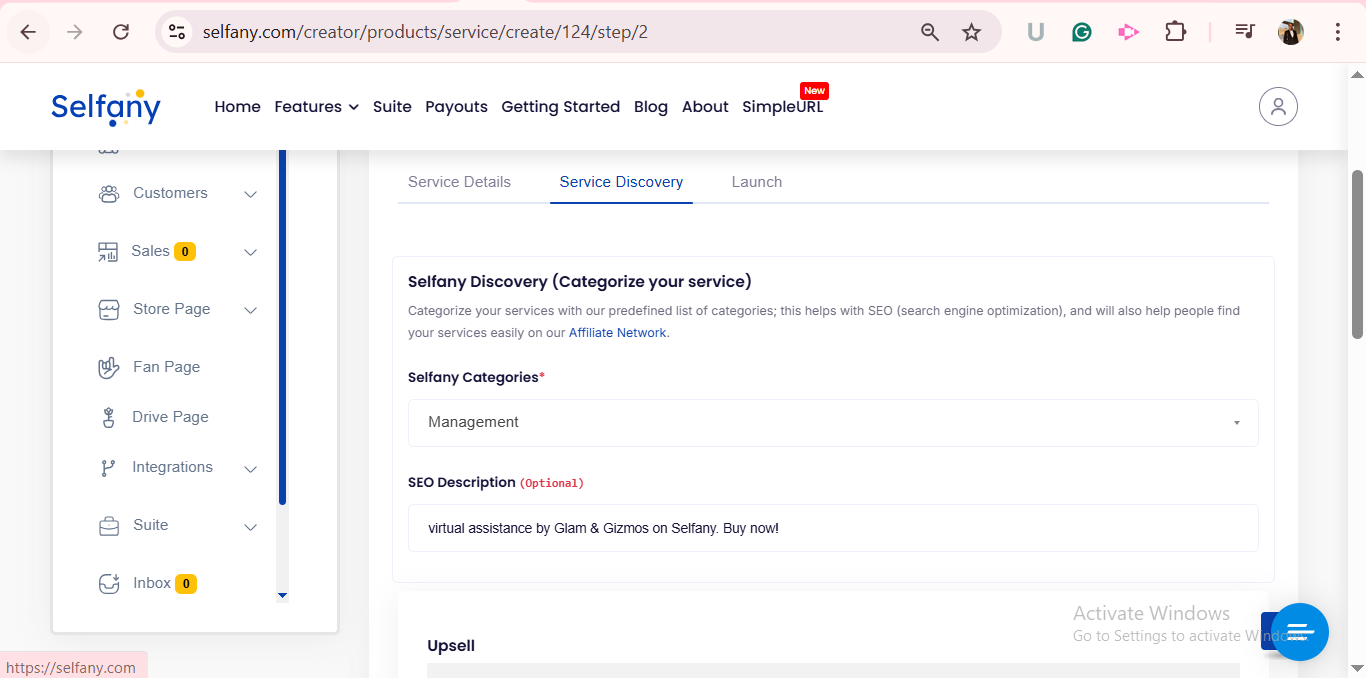
-
Select a Category: Choose the appropriate category for your service. For example, management, web development, career development, etc. This helps your service appear in relevant searches on the platform.
-
SEO Description (Optional): Add a brief promotional text to improve discoverability through search engines.
4.5 Publish Your Payment Page
Once all details are filled in, move to the launch section:
-
Custom URL: Personalize the link to your service for easy sharing. For example, the link could be customized to “https://selfany.com/virtualassistancebyjohndoe.”
-
Publish the Page: Set the status to “Publish” and click “Update” to make the page live.
Your service is now available online. Clients can view your offering, see your availability, and make payments directly through the secure link.
5. Share Your Payment Link With Clients
Now that your payment page is live, it’s time to make it easy for clients to pay. Here’s how you can share your payment link and start receiving payments right away:
5.1 Copy the Payment Link
-
Head to your service discovery menu under your service details page and find the link to your payment page.
-
Copy the link with one click—it’s ready to go!
5.2 Share via Multiple Platforms
-
Email: Send the link directly to clients via email.
-
Direct Messages (DMs): Share the link with clients through DMs on social media platforms like Instagram, Twitter, or LinkedIn.
-
WhatsApp: Share the link in your WhatsApp groups or chats.
-
Social Media: Post the link to your stories, bio, or posts on Instagram, Facebook, or Twitter.
Wherever your clients are, sharing your payment link is quick and easy. The more platforms you use, the better your chances of reaching clients and getting paid fast!
6. Track Payments and Withdraw Earnings
Once you start receiving payments, it’s important to stay on top of your orders and easily withdraw your earnings. Here’s how to do it:
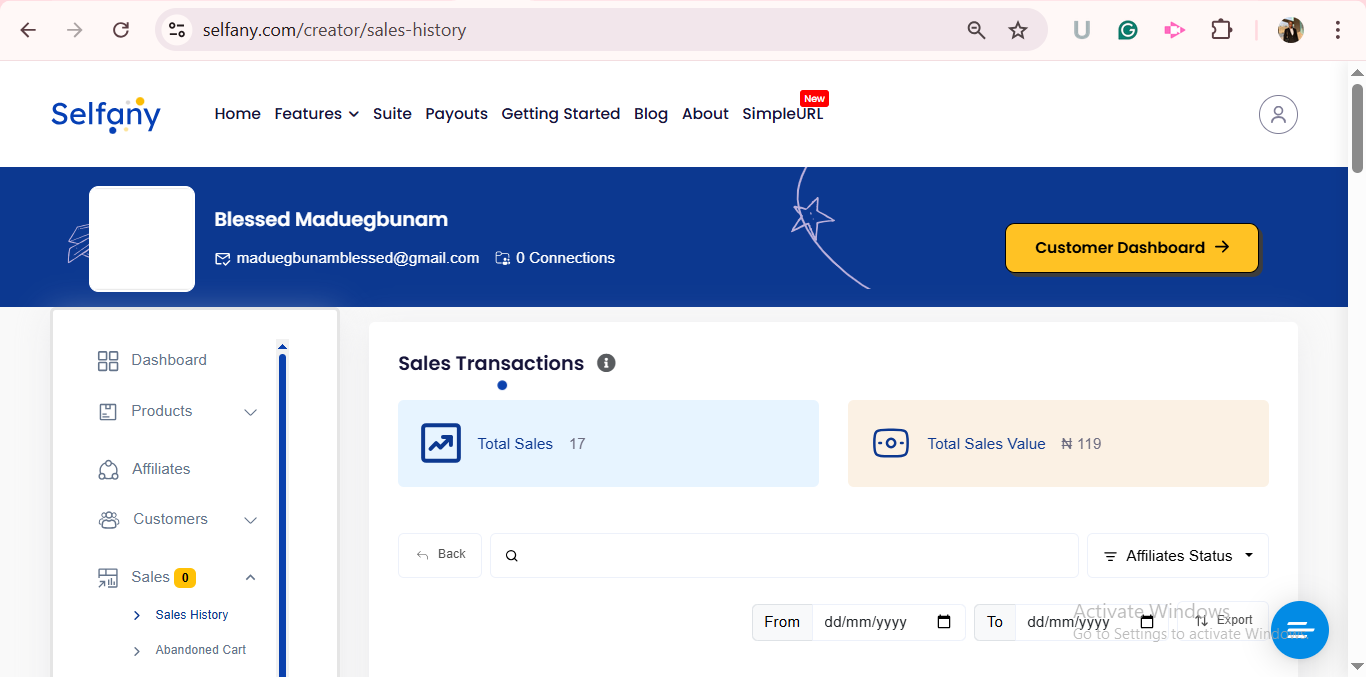
6.1 View Orders
-
A notification will be sent to you by mail regarding new orders
-
Head to “Sales” on your dashboard to see a clear list of all your sales.
6.2 Withdraw to Your Bank Account
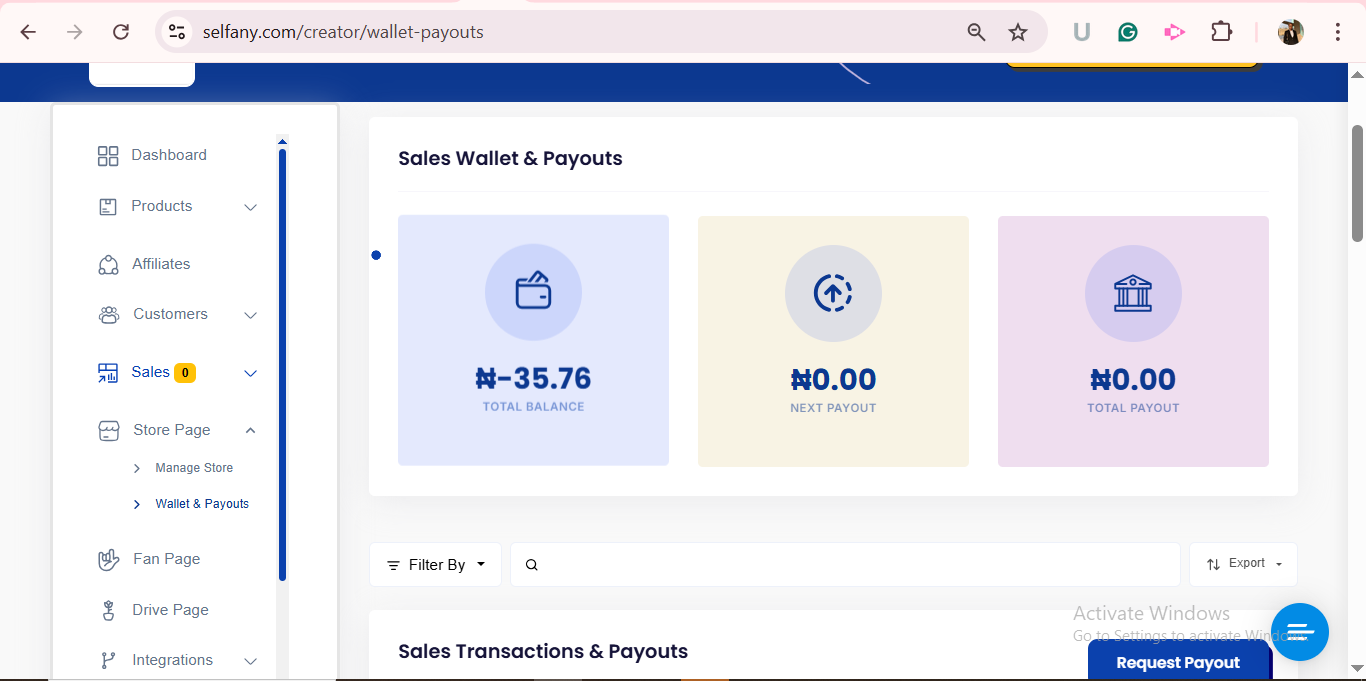
- Go to the “Storepage” section on your dashboard.
-
Select your “Wallets and Payouts”
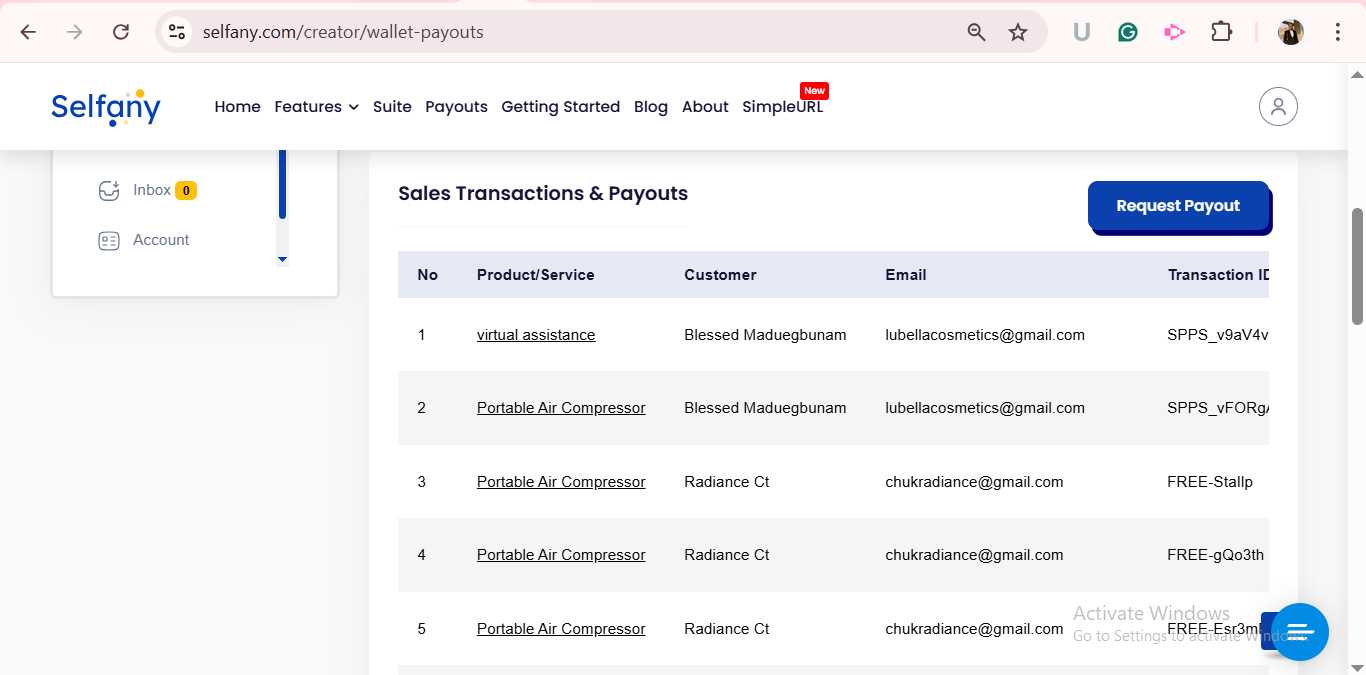
-
Scroll down and click on “Request Payout”
-
Once your client’s payment has reflected in your Selfany wallet, simply enter the amount you’d like to withdraw and click 'Request Payout'. Your funds will be sent directly to your bank account within one working day.
It’s that easy! With Selfany, you can track all your payments in real time and withdraw your earnings when it’s convenient for you. No more waiting or complicated processes!
7. Pro Tips To Get Paid Faster
Want to get paid quicker and keep clients happy? Here are some pro tips to make it happen:
1. Create a Services Catalogue
-
Organize your services into categories for easy browsing.
-
Create clear, attractive service descriptions for each service or product so clients can quickly find what they need.
2. Use Multiple Currencies
-
Make your services accessible to international clients by accepting payments in different currencies.
-
Selfany supports multiple currencies, helping you reach clients worldwide with ease.
3. Encourage Referrals
-
Ask happy clients to refer others to your services. Word-of-mouth marketing is one of the best ways to get new clients and boost your business.
By following these tips, you'll streamline your payment process and build stronger relationships with your clients, leading to faster payments and more business!
8. Frequently Asked Questions (FAQs)
Got questions? We’ve got answers! Here’s what you need to know about getting paid as a freelancer or creator on Selfany:
-
Can I receive payments internationally?
Yes! Selfany allows you to accept payments from clients worldwide, making it easy to work with international clients. -
Do I need a website?
Nope! You don’t need a website to use Selfany. You can easily set up your service page details and start receiving payments without any technical setup. -
How long does it take to receive funds?
Payments are typically processed within a few hours, but it may take up to 1 business day. -
What currencies does Selfany support?
Selfany supports multiple currencies, including Nigerian Naira, USD, GBP, and more. This helps you serve a global audience without worrying about currency conversion.
Getting paid as a freelancer or creator has never been easier. From signing up and setting up your profile to receiving payments, Selfany makes the process simple and hassle-free.
Ready to get paid? Set up your Selfany page today and start receiving payments from clients around the world in no time!